Measure a Door for Smart-Lock Compatibility
Build a model-ready record of door thickness, backset, bores, cylinder dimensions, clearances, swing, and lock operation without treating one product’s measurements as universal.
Jump to a section
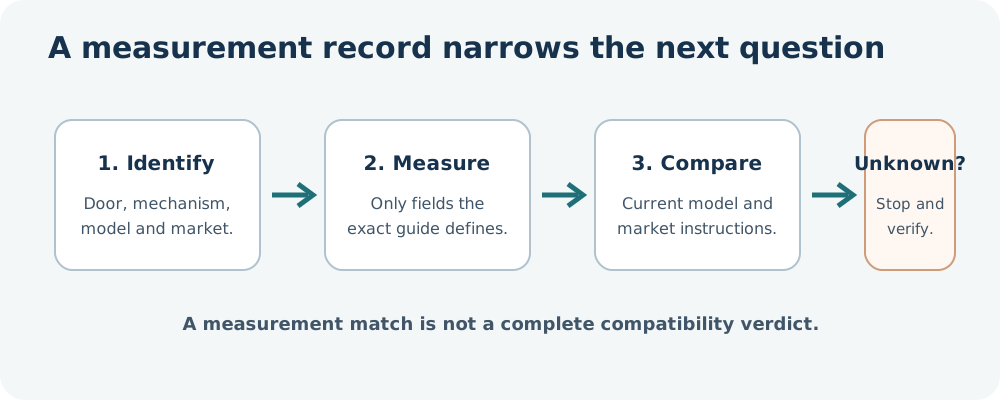
A useful measurement record lets you compare your door with one exact smart-lock model and market. It is not a universal pass-or-fail chart. Two products can use different preparation, cylinder, and clearance requirements even when both are sold for “standard” doors.
Gather information before measuring
Write down the country where the lock will be used, the door or lock manufacturer and model if known, and whether the product is a retrofit over existing hardware or a full replacement. Identify the normal locking action first. If the door is shared, fire-rated, unusually heavy, damaged, or does not operate freely, leave modifications to the manufacturer or a qualified professional.
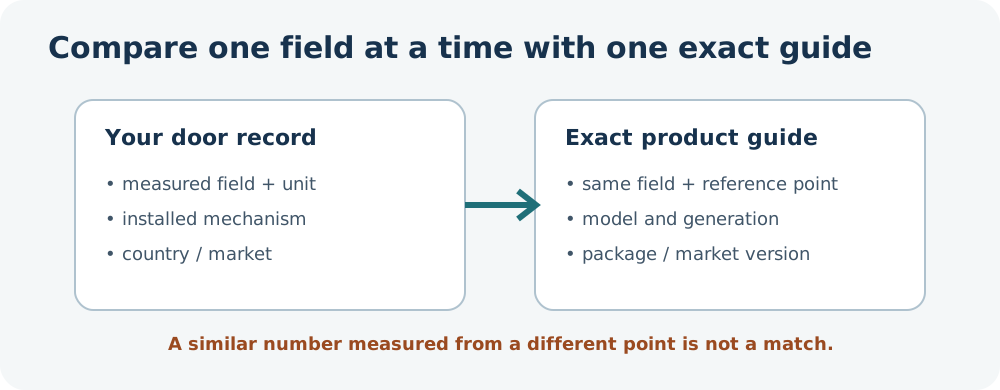
Use a tape measure or ruler and record the unit shown in the exact installation guide. You may record both inches and millimetres for convenience, but do not round a close measurement or convert a value in a way that changes the manufacturer’s limit.
If you print a manufacturer’s measurement template from a PDF, check its printed ruler against a known dimension and use the scale specified by that guide. Yale’s Check Your Door guide, for example, says to print at 1:1 and verify the ruler when printing from an electronic file.
Record the fields that apply
| Field | How to record it | Why a model checker may need it |
|---|---|---|
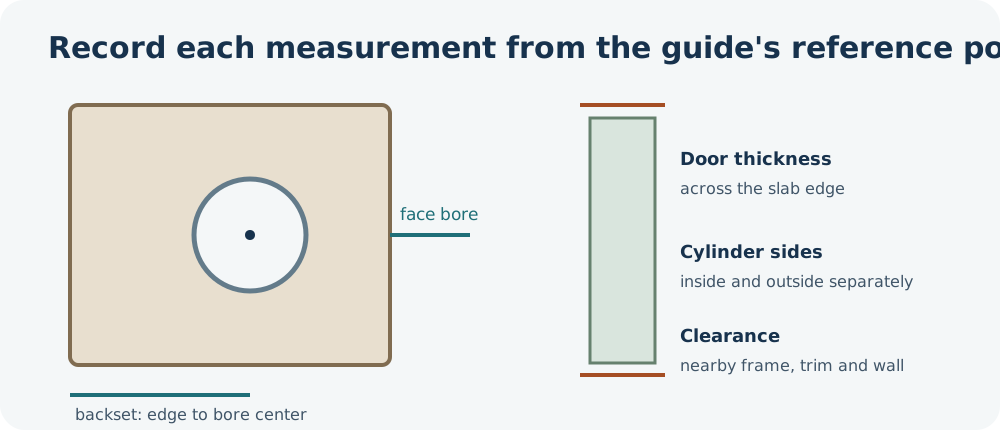
| Door thickness | Measure across the door edge, not across decorative trim. Record the value and units. | Screw length, mounting plates, and supported installation paths can depend on thickness. |
| Backset | Record the distance from the door edge to the centreline of the face bore, using the product guide’s diagram. | Replacement latches and bolts may have more than one setting. |
| Face or cross bore | Measure the large hole through the face of the door, if present. | The interior or exterior assembly may not fit a hole that is too small or too large. |
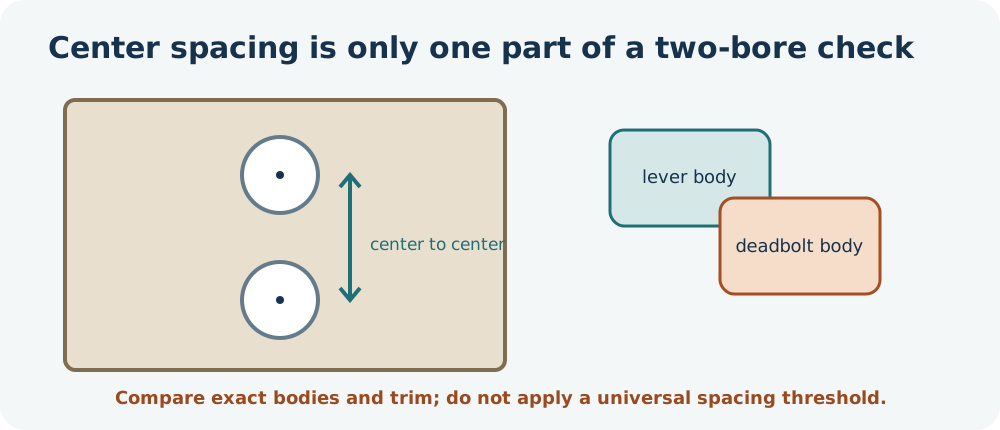
| Two-bore spacing and overlap | When separate lever and deadbolt bodies share one door, measure center-to-center and compare the actual bodies with exact drawings. | Familiar spacing can still leave the bodies overlapping; do not transfer a model-specific spacing example to another pairing. |
| Edge bore and latch | Measure the hole through the door edge and note the latch or bolt shape. | Its diameter, depth, and position vary by product. |
| Cylinder | Record the profile name and measure the inside and outside sides separately using the exact cylinder guide’s reference point. | Unequal lengths, protrusion, key type, or a thumbturn can change the correct cylinder or adapter. |
| Tailpiece or retrofit interface | If the exact product couples to an existing tailpiece, check that model’s guide and measurement card. Keep this reading separate from backset and cylinder-side lengths. | Adapter geometry and acceptable tailpiece range are product-specific. |
| Clearances | Record the space between the lock centre and nearby frame, handle, trim, glass, or wall. Note which way the door swings. | A lock body may hit nearby hardware even when the bore and backset match. |
| Door and panel details | Record material, hinges, opening direction, which panel moves first, and which handle or key action secures it. | Patio, multipoint, and special door systems may need a product-specific operating sequence. |
| Strike and alignment | With the door open, observe whether the bolt or latch moves smoothly. Note any need to push, pull, or lift the door to close or lock it. | Resistance or misalignment can make an otherwise plausible measurement match unreliable. |
| Electronics | Record the exact smart-lock variant, requested app features, platform, hub or controller, and firmware requirements separately. | Electronic or ecosystem support does not establish physical fit. |
Do not drill, enlarge a hole, remove a cylinder, or change a strike just to complete this record. If the product guide requires an adjustment, verify the exact procedure, permission, and door construction first.
Read measurements as product-specific examples
The Schlage Control BE467F preparation instructions, for example, list a 1-3/8 to 1-3/4 inch door, 2-3/8 or 2-3/4 inch backset, a 2-1/8 inch face hole, and a 1 inch edge hole. That describes this lock’s preparation path. It does not define the limits for every Schlage lock or every smart deadbolt.
Clearance can depend on swing direction as well. Nuki’s U.S. guide gives different frame clearances for inward- and outward-opening doors. For its separate U.S. Deadbolt path, Nuki’s mounting guide checks tailpiece overhang against the supplied measurement card before selecting a direct or extension-plate mounting path and a fitting adapter. Use the card for the exact product; this is not a general tailpiece limit. Aqara’s U400 product page identifies single-cylinder deadbolts and specifies its supplied strike, but does not give a complete installation matrix on that page. A page that lists some requirements may not contain a complete installation matrix.
Allegion’s support article gives one example of separate Schlage FE789 and Encode deadbolt bodies overlapping at typical 5-1/2-inch bore spacing. It discusses greater spacing for that exact pairing, but disclaims accuracy and completeness. Use current drawings for the exact models and the actual door; this example is not a universal minimum or permission to re-drill.
Take useful, privacy-conscious photos
If a manufacturer or installer asks for photos, capture the door edge, interior and exterior hardware, frame or strike, hinges, handle, and visible product markings. Do not include access codes, key cuts, temporary passwords, an address, or other information that would grant access or identify your home. Keep the door in a normal, safe state while taking pictures.
Carry the record into an exact-model check
Use the relevant next guide for North American deadbolts, cylinder profiles, or swing and locking sequence. Leave any unmeasured field marked unknown. A complete record makes the next question more precise; it does not replace a current manual or manufacturer check.
Reference material
Sources for this guide
- Schlage Control Smart Deadbolt Door Preparation InstructionsPrimary
- Verify Measurements with the Check Your Door GuidePrimary
- Nuki Smart Lock: Compatibility GuidePrimary
- Smart Lock (U.S. Deadbolt): mounting & installationPrimary
- Yale Linus Adjustable Cylinder datasheetPrimary
- Aqara Adjustable Cylinder for Smart Lock U200 User ManualPrimary
- Smart Lock U400: Unlocks on Approach with UWBPrimary
- Can You Install an Encode Lever and Another Encode Series Deadbolt on the Same Door?Primary